Dioxus Hello World
Prerequisites
If you have not done so already, install the dioxus cli:
cargo install dioxus-cli
This is a wrapper around cargo and installed globally, since it can also be used to init new projects.
First Hello World
Our dioxus part will be the frontend directory. So go ahead an go into the frontend dir
cd frontend
Now add the needed dependencies to your Cargo.toml
cargo add dioxus --features web
and add the following to your main.rs in src/.
use dioxus::prelude::*;

fn main() {
    launch(App);
}

#[allow(non_snake_case)]
pub fn App() -> Element {
    rsx! {"Hello World"}
}
Components in Dioxus are plain functions starting with a capital letter (PascalCase).
The rsx! macro is Dioxus own Domain Specific Language (dsl), which works similar to jsx in React for example.
Let's run our frontend! For this we now need the prior installed dioxus-cli.
dx serve --hot-reload
The --hot-reload flag will recompile your code, when you save your files, that are currently being served.
With default settings, you can now watch your hello world application at localhost:8080.
Congrats! Your (maybe) first webpage written in Rust!
If you want, you can change the content in your hello world. For example using a variable?
#![allow(unused)]
fn main() {
pub fn App() -> Element {
    let rust_basel = "Rust Basel";
    rsx! {"Welcome to {rust_basel}"}
}
}
It's all about style - let's add tailwind and daisyUi
Great. Now that our web hello world is running, let's add some styling to it.
Of course no one likes raw CSS, which is why we are going to add Tailwindcss, which has
some sane defaults and add a tailwind component library to it. It's called DaisyUi.
You define the style of your DOM components directly as classes in the rsx macro. No need for an extra css file, you have to maintain.
Tailwind will watch the style classes, you define within your markdown and will automatically generate the correct css for you.
Daisyui is a tailwind component library. As tailwind itself is quite mighty, DaisyUI enhances tailwind and make styling easy having ready to use components like buttons, navbars, etc.
Installing dependencies
First we go ahead and install our dependencies.
We want all configuration files top-level. So go back, where your top-level Cargo.toml is
and initialize npm there. Then install tailwindcss for development and initialize tailwind.
cd ..
npm init
Just say yes to all defaults. This should give a package.json, which looks like this:
package.json:
{
  "name": "fullstack-workshop",
  "version": "1.0.0",
  "description": "",
  "main": "index.js",
  "scripts": {
    "test": "echo \"Error: no test specified\" && exit 1"
  },
  "author": "",
  "license": "ISC"
}
Then go ahead and install tailwindcss as development library and initialize it.
npm install -D tailwindcss
npx tailwindcss init
As last, go ahead and install daisyUi.
npm install -D daisyui@latest
Sorry for installing so many dependencies. And welcome to the npm world! :) However, these will only be development dependencies and will run on your machine only, never on the server or client. Only the CSS resulting from build is served.
Changing the configuration files
Now that we have all dependencies, we need to adapt the configuration to let tailwind know where to look for classes.
Changes to tailwind.config.js so it will watch the rsx classes in our .rs files:
module.exports = {
  mode: "all",
  content: [
    // include all rust, html and css files in the src directory
    "./frontend/src/**/*.{rs,html,css}",
    // include all html files in the output (dist) directory
    "./frontend/dist/**/*.html",
  ],
  theme: {
    extend: {},
  },
  plugins: [require("daisyui")],
  daisyui: {
    themes: [
      "cupcake",
    ],
  },
}
At very last, add a input.css to the frontend crate. This is the target file for tailwind to generate the css for you,
and this is the only stylesheet file we will serve to the browser.
first cd into the frontend crate
cd frontend
then add a input.css with the following contents:
@tailwind base;
@tailwind components;
@tailwind utilities;
that's it. now let's test our new styles.
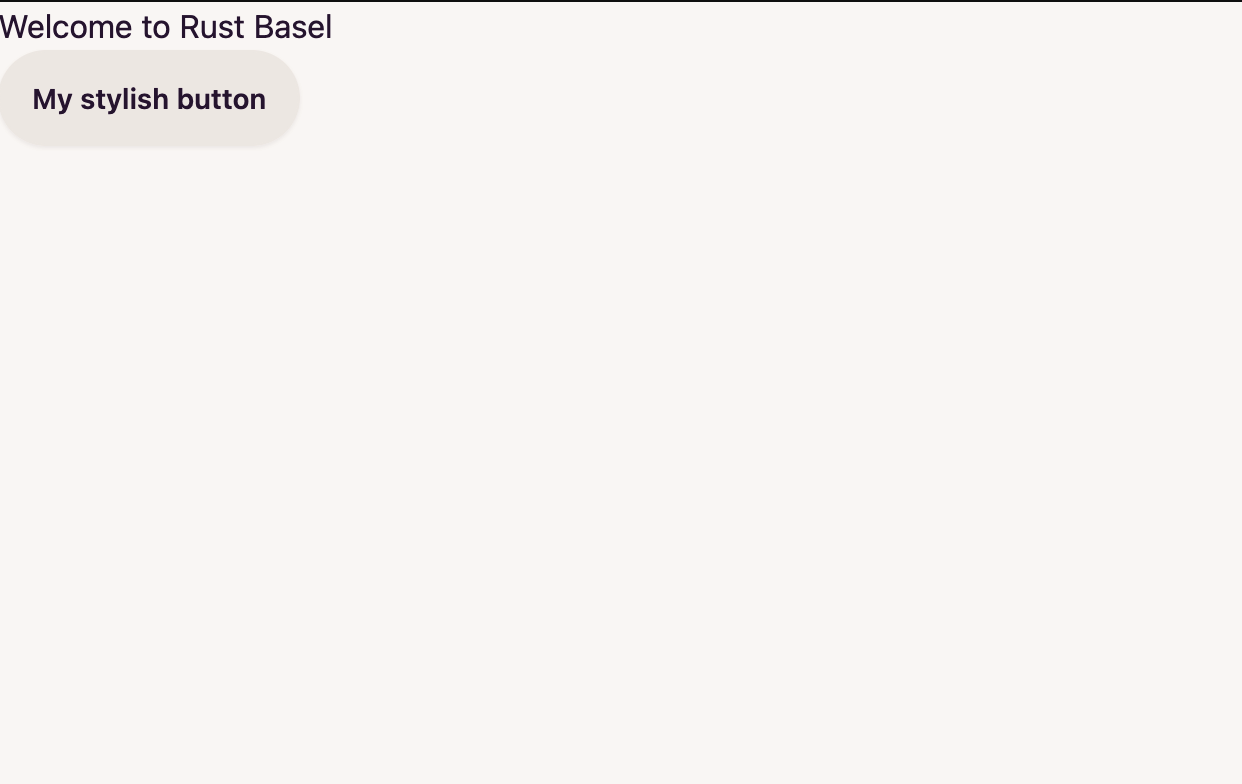
let's add a stylish button!
go to your main.rs in the frontend crate, and add a button
#![allow(unused)]
fn main() {
pub fn App() -> Element {
    let rust_basel = "Rust Basel";
    rsx! {
        h1{
            "Welcome to {rust_basel}"
        }
        button{
            class: "btn",
            "My stylish button"
        }
    }
}
}
The btn class is defined in the daisy ui components https://daisyui.com/components/button/#button. Have a look, if you want to try other classes.
To now let tailwind create the fitting css files, run the tailwind watcher in another terminal. It watches, if any of your watched files (defined in the top-level tailwind.config.js)
changes and re-generated the css file.
(Note: run from top-level)
npx tailwindcss -i ./frontend/input.css -o ./frontend/public/tailwind.css --watch
Tailwind will regenerate a css file into your frontend/public/ directory, where dioxus will fetch the style from (by default).
Now, let's finally have a look at our stylish first website!
(Note: run from frontend dir)
dx serve --hot-reload
If everything worked our, you should have a page that looks like this:

You still might need some hard refreshes or server restarts with CTRL + C and dx serve --hot-reload from time to time,
but we will refine the hot reloading setup later on.
All the commands, you have to run manually now will be put in a nice package that spins everything up with one command.
Dioxus Alternatives
Dioxus is not the only framework of its kind. There is leptos, which is a close competitor which seems to have a narrower focus and seemingly more production use.
And there is yew, which has been around for years, and is without a doubt production-ready and battle-tested. Compared with the newer generation, you
have to fight around with lifetimes withing your dependency tree a lot. Dioxus is able to circumevent this with clever types, and deferring a few lifetime checks to runtime.
This leads to a developer experience comparable to react (except for the tools, of course).